This article walks you through the entire process once: from an empty dashboard to a link you can send to your first reader. The actual steps take about fifteen minutes. There are two things you’ll need to wait for — account moderation (usually up to 24 hours) and PDF processing (usually a few minutes).
What you’ll have at the end
- Your PDF is turned into a protected online document: pages are delivered as images, and the original file is never made available to the buyer.
- The buyer’s email address is added as a watermark to every page.
- You get a personalized link for each reader, which you can revoke or freeze at any time.
Step 0. Registration and moderation
During registration, provide your area of expertise and links to your public profiles — website, Telegram, Instagram. This is not just a formality: accounts are reviewed manually, and links showing your public presence can significantly speed up the review.
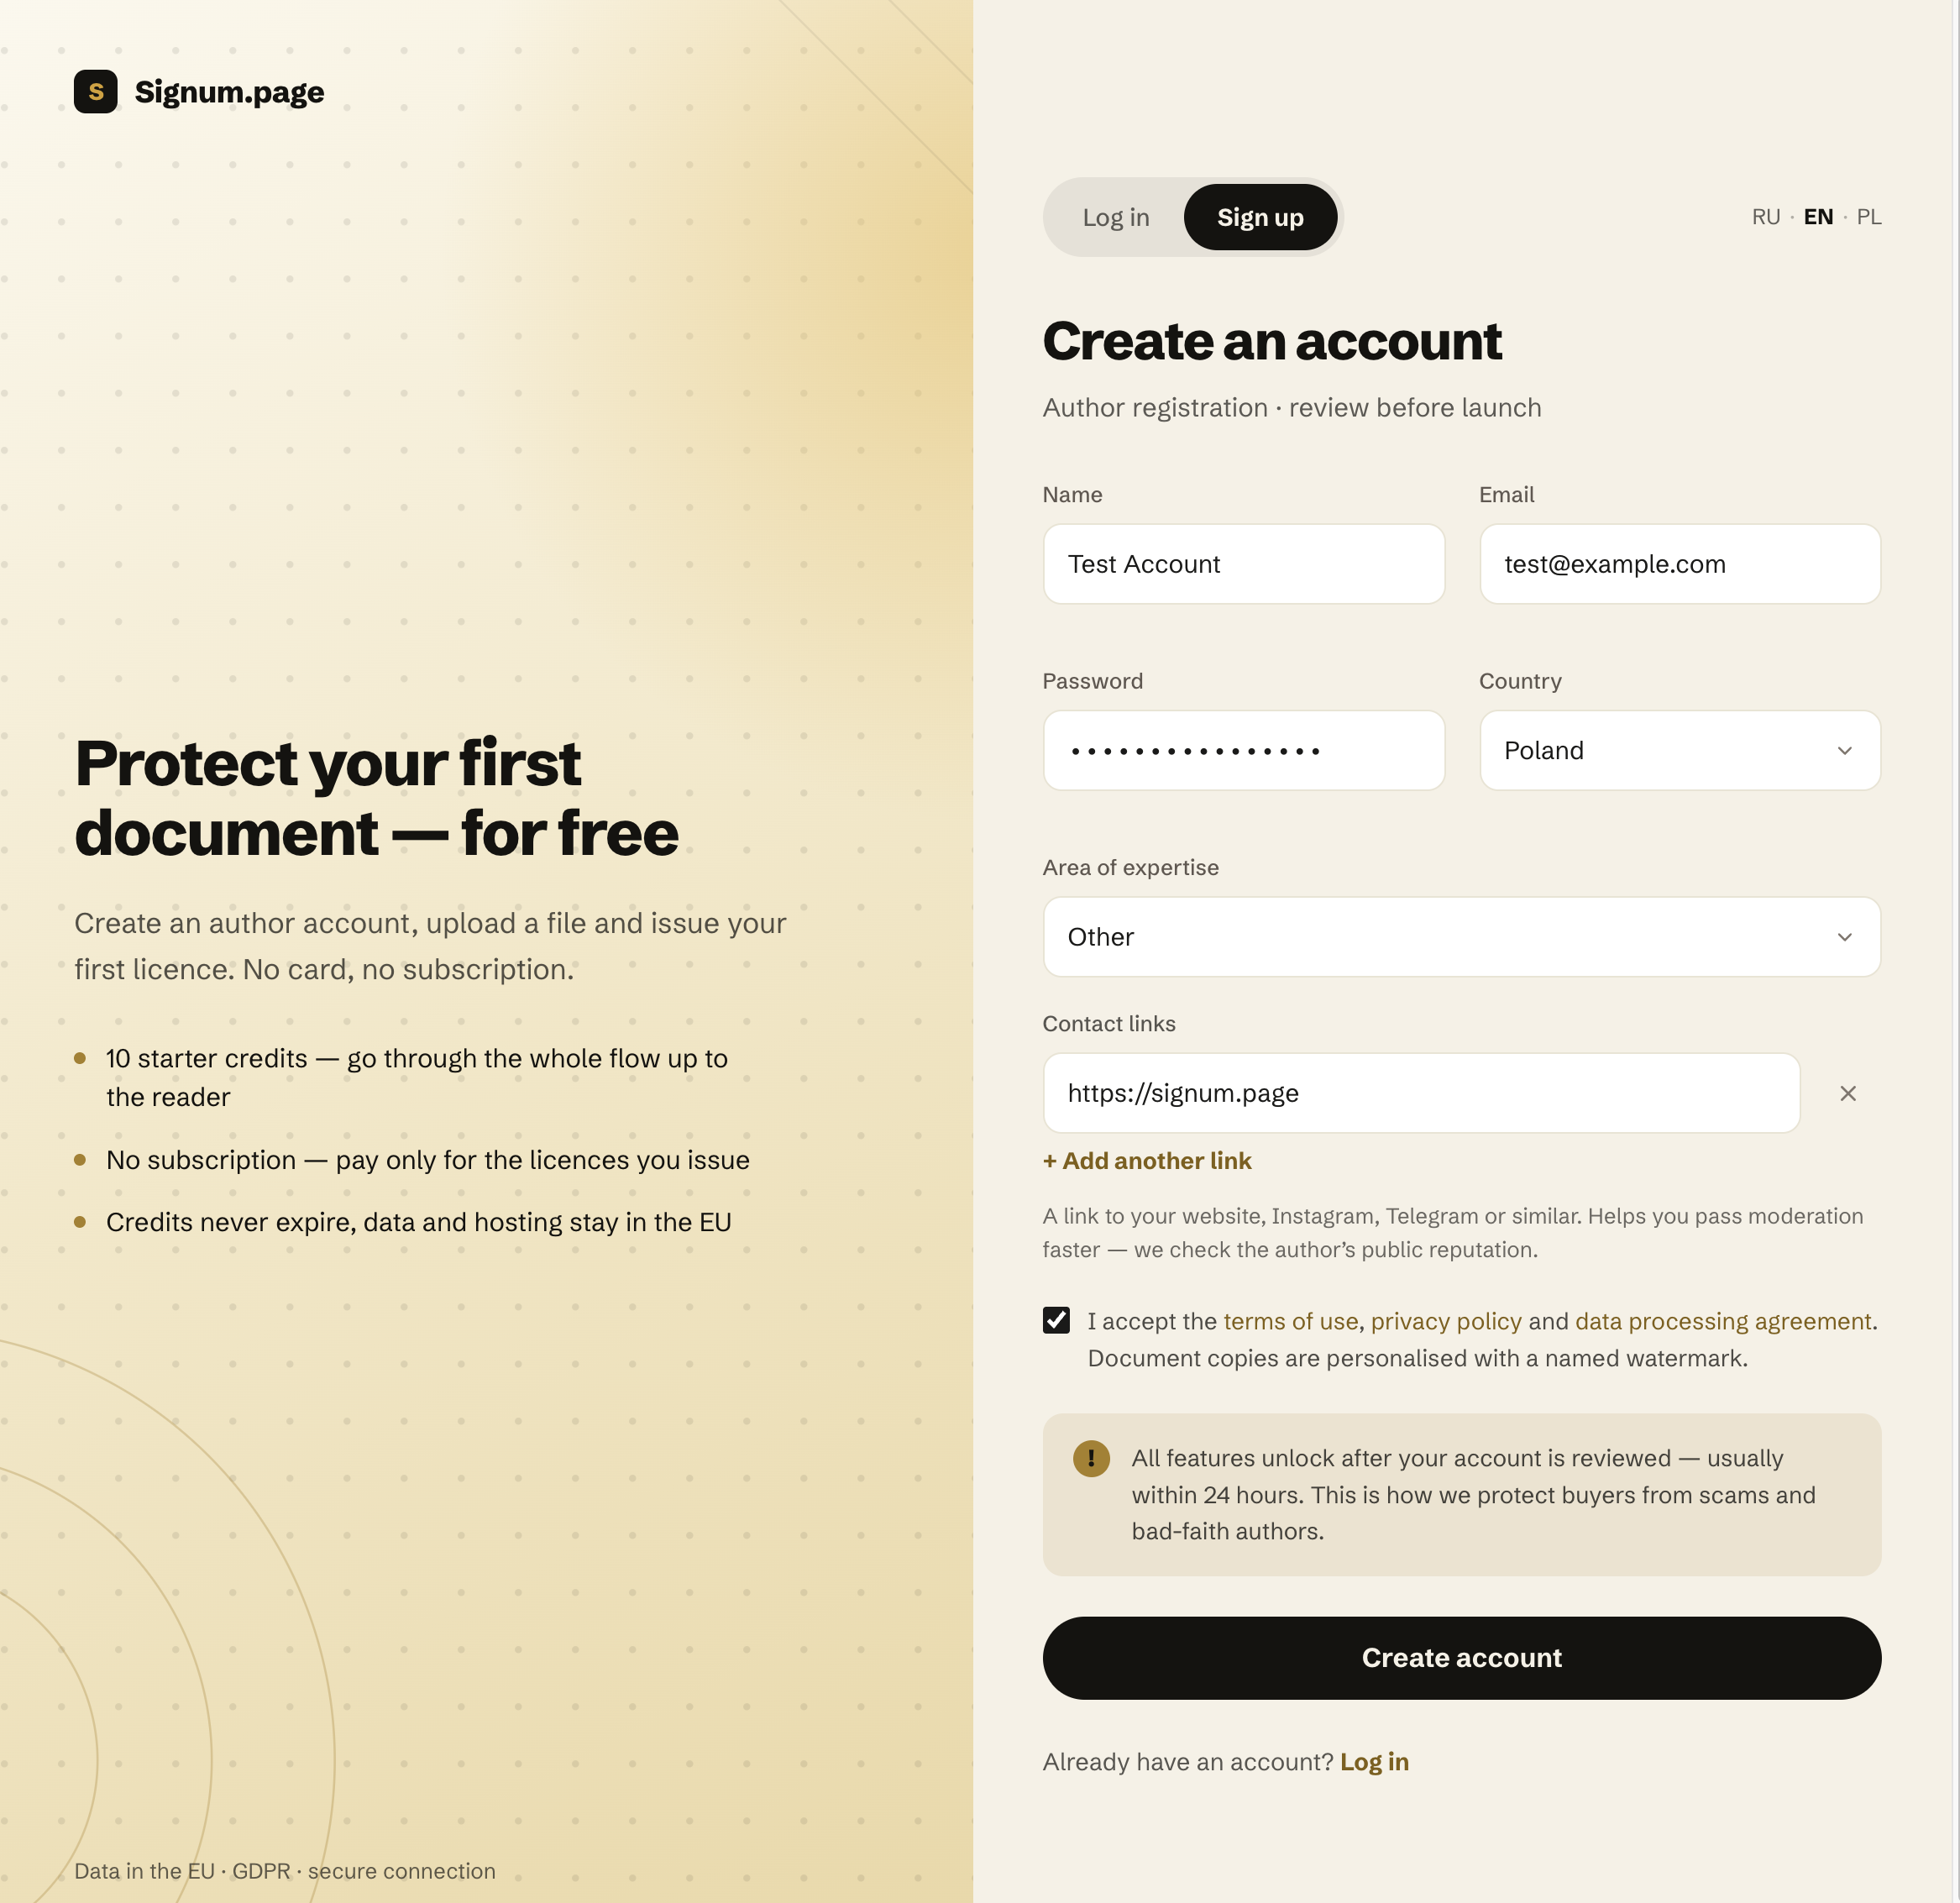
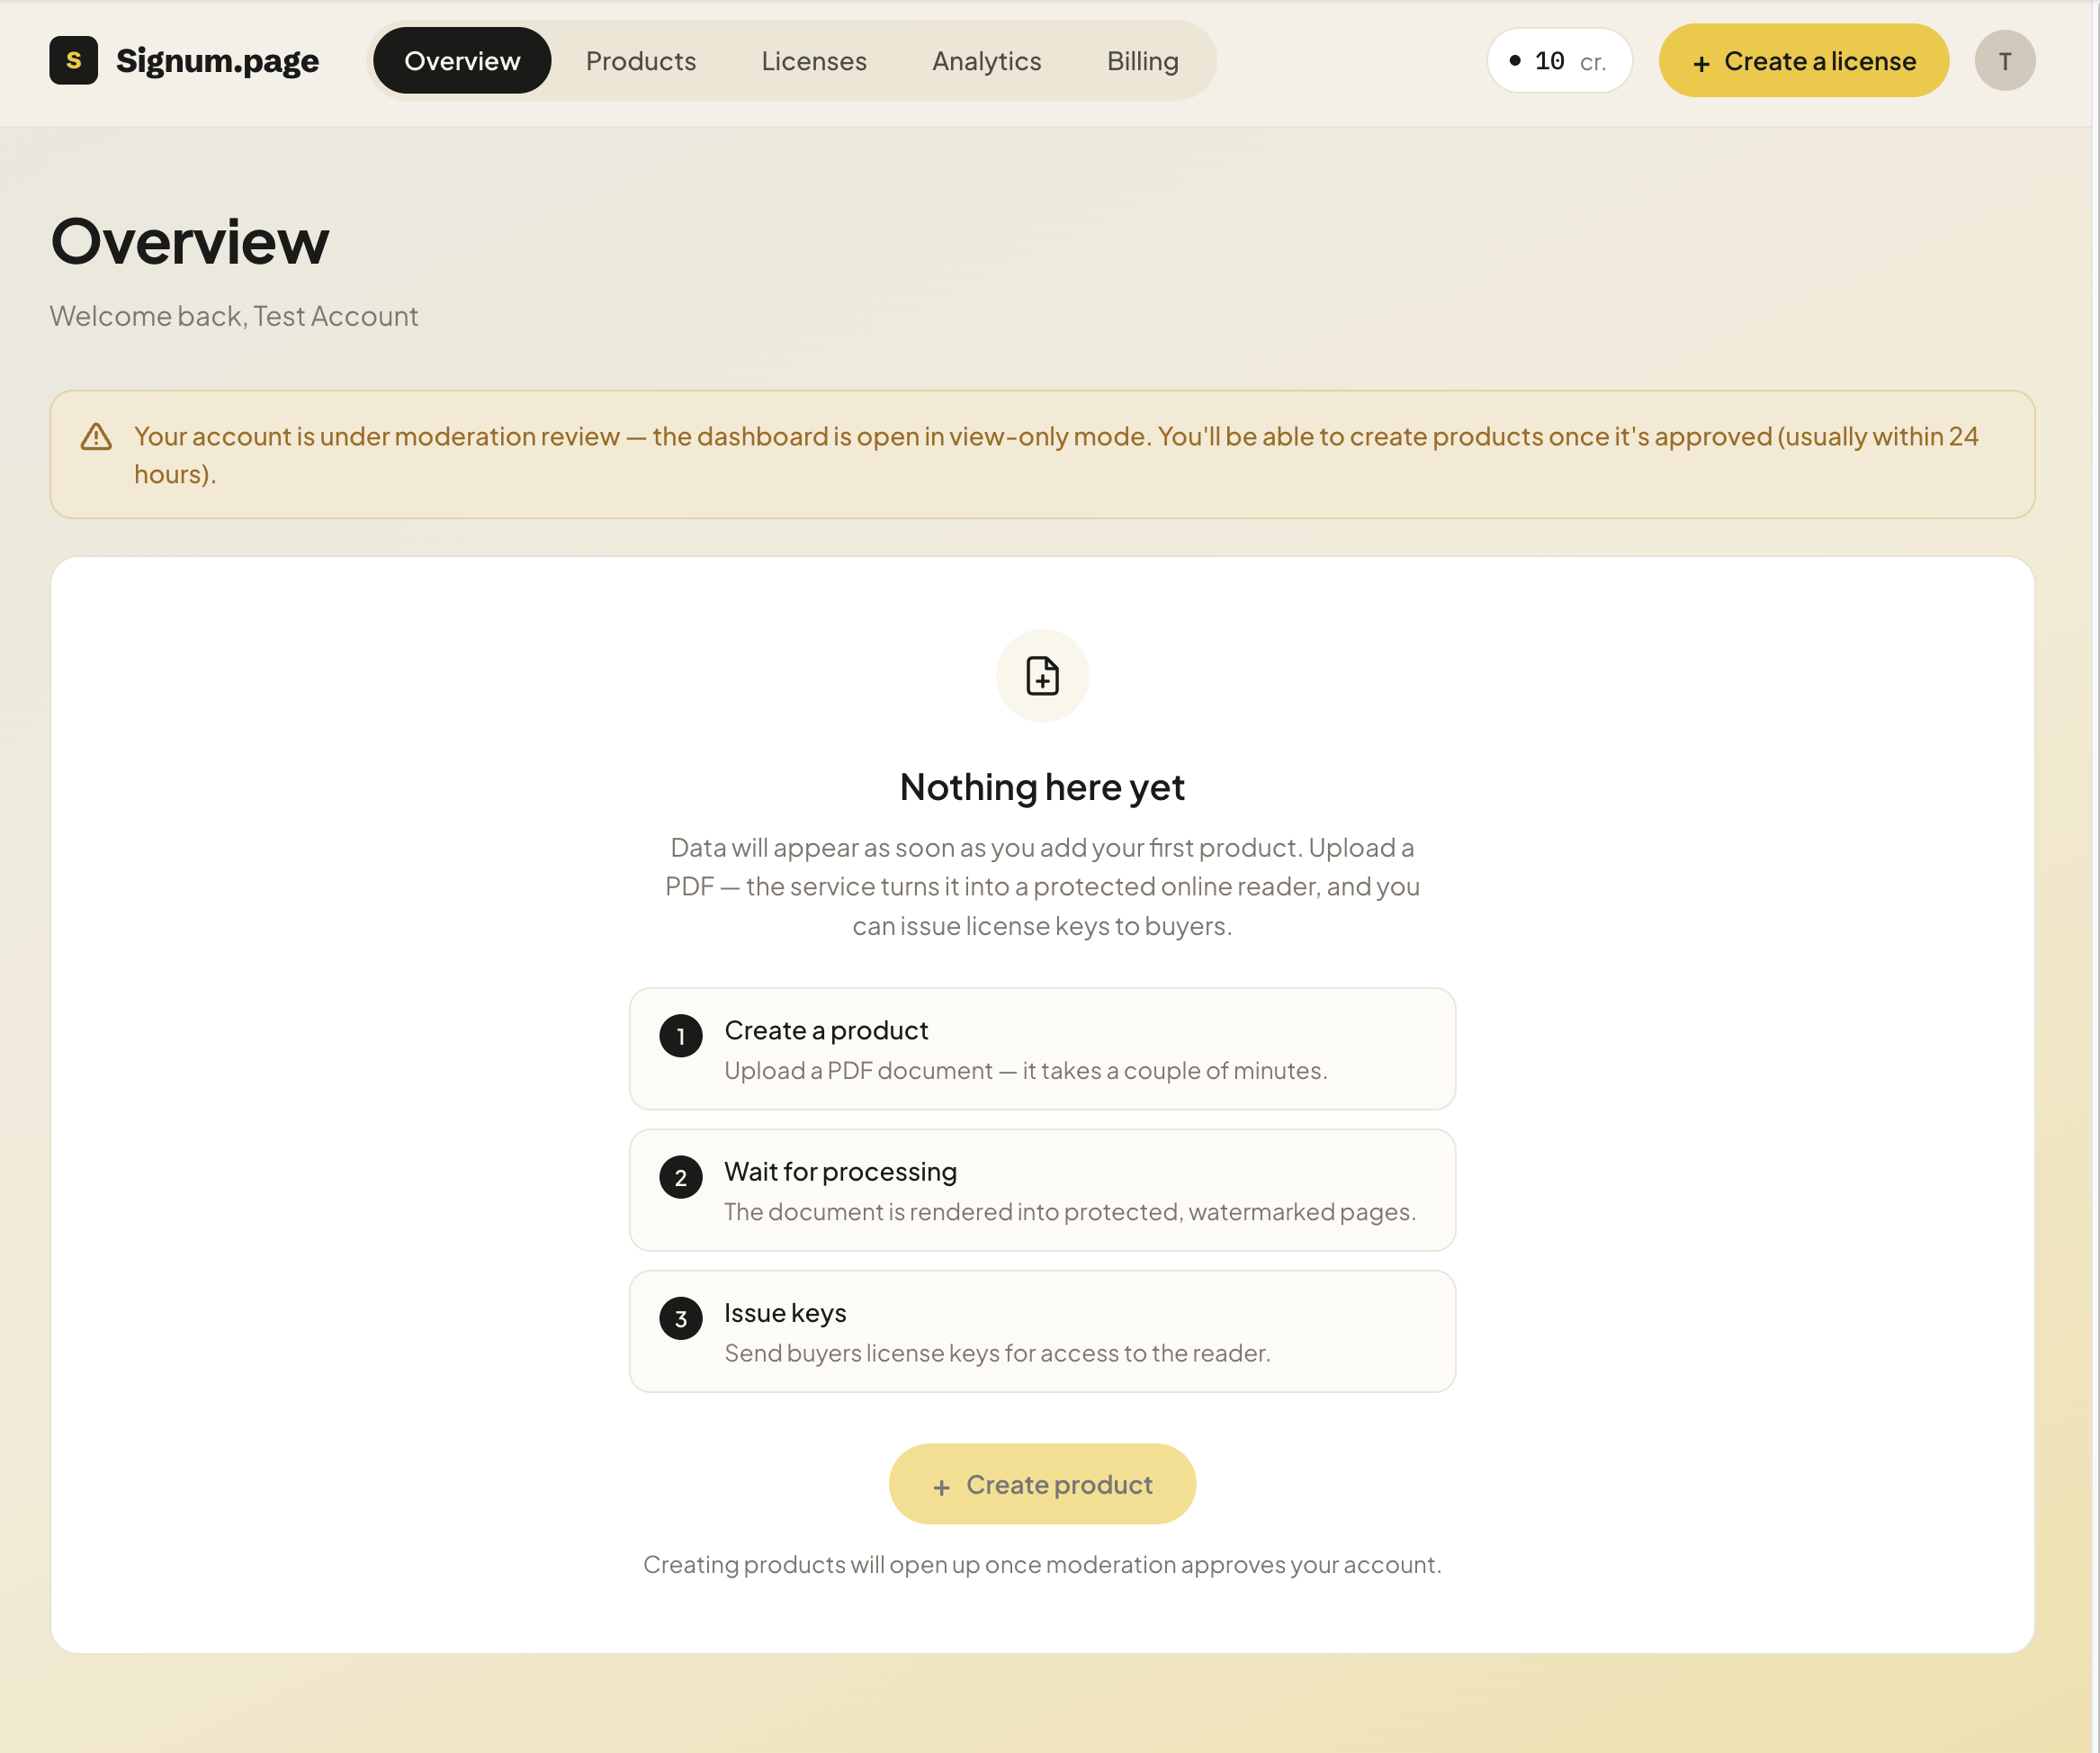
After registration, confirm your email using the link in the email and sign in to your dashboard. Until your account is approved, the dashboard is available in view-only mode: you’ll see the sections, but the product creation button will be disabled with the message “Available after moderation”. You don’t need to do anything — once moderation is complete, your dashboard will be unlocked automatically.
Immediately after registration, you receive 10 free credits. One credit equals one issued key, so you don’t need to pay for your first ten buyers. Your balance is shown in the Billing section.
Step 1. Create a product
A product is your complete digital product: its name, description, and the PDF document your buyer will read. Go to Products → Create product and fill in three fields:
- Name — what the buyer will see in the reader header.
- Description — a couple of sentences, also visible to the buyer.
- PDF file — the first version of your document.
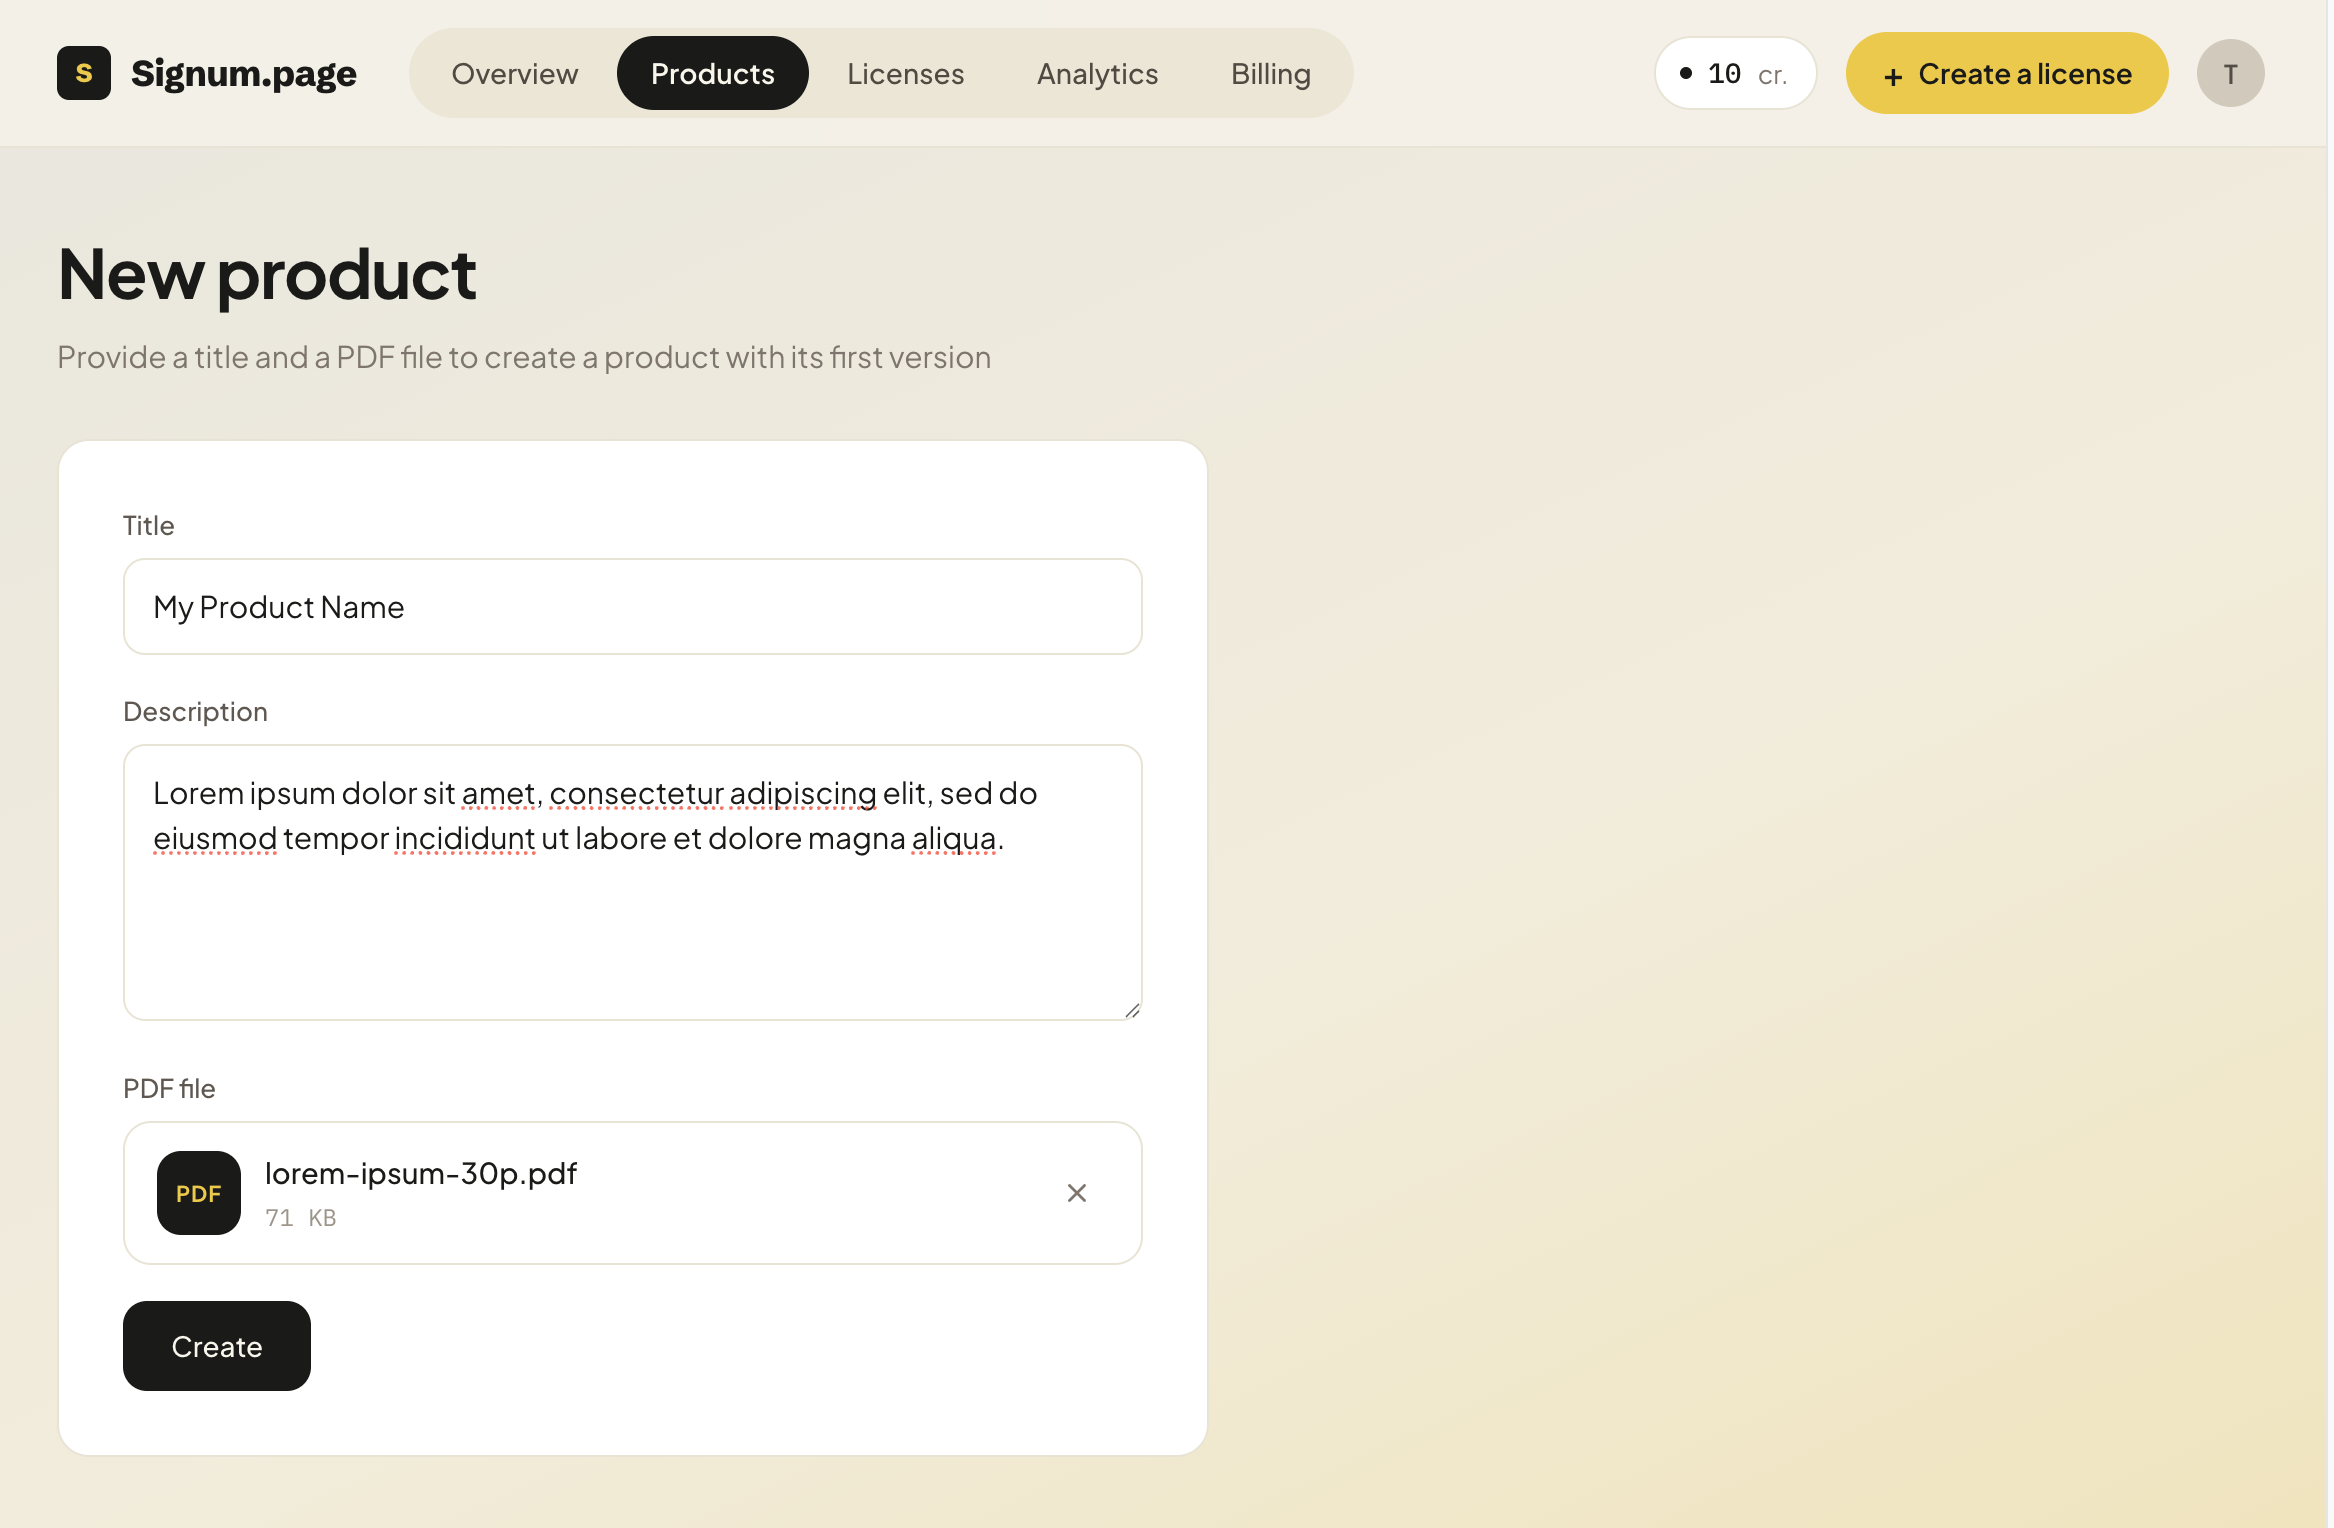
Click “Create”. The file will be processed immediately — there is no need to upload it separately.
Step 2. Wait for processing
We process the PDF page by page and render each page as an image. The version card goes through the following statuses: uploaded → processing → ready. This usually takes a few minutes; large documents may take longer. You can close the page and come back later — processing continues on the server.
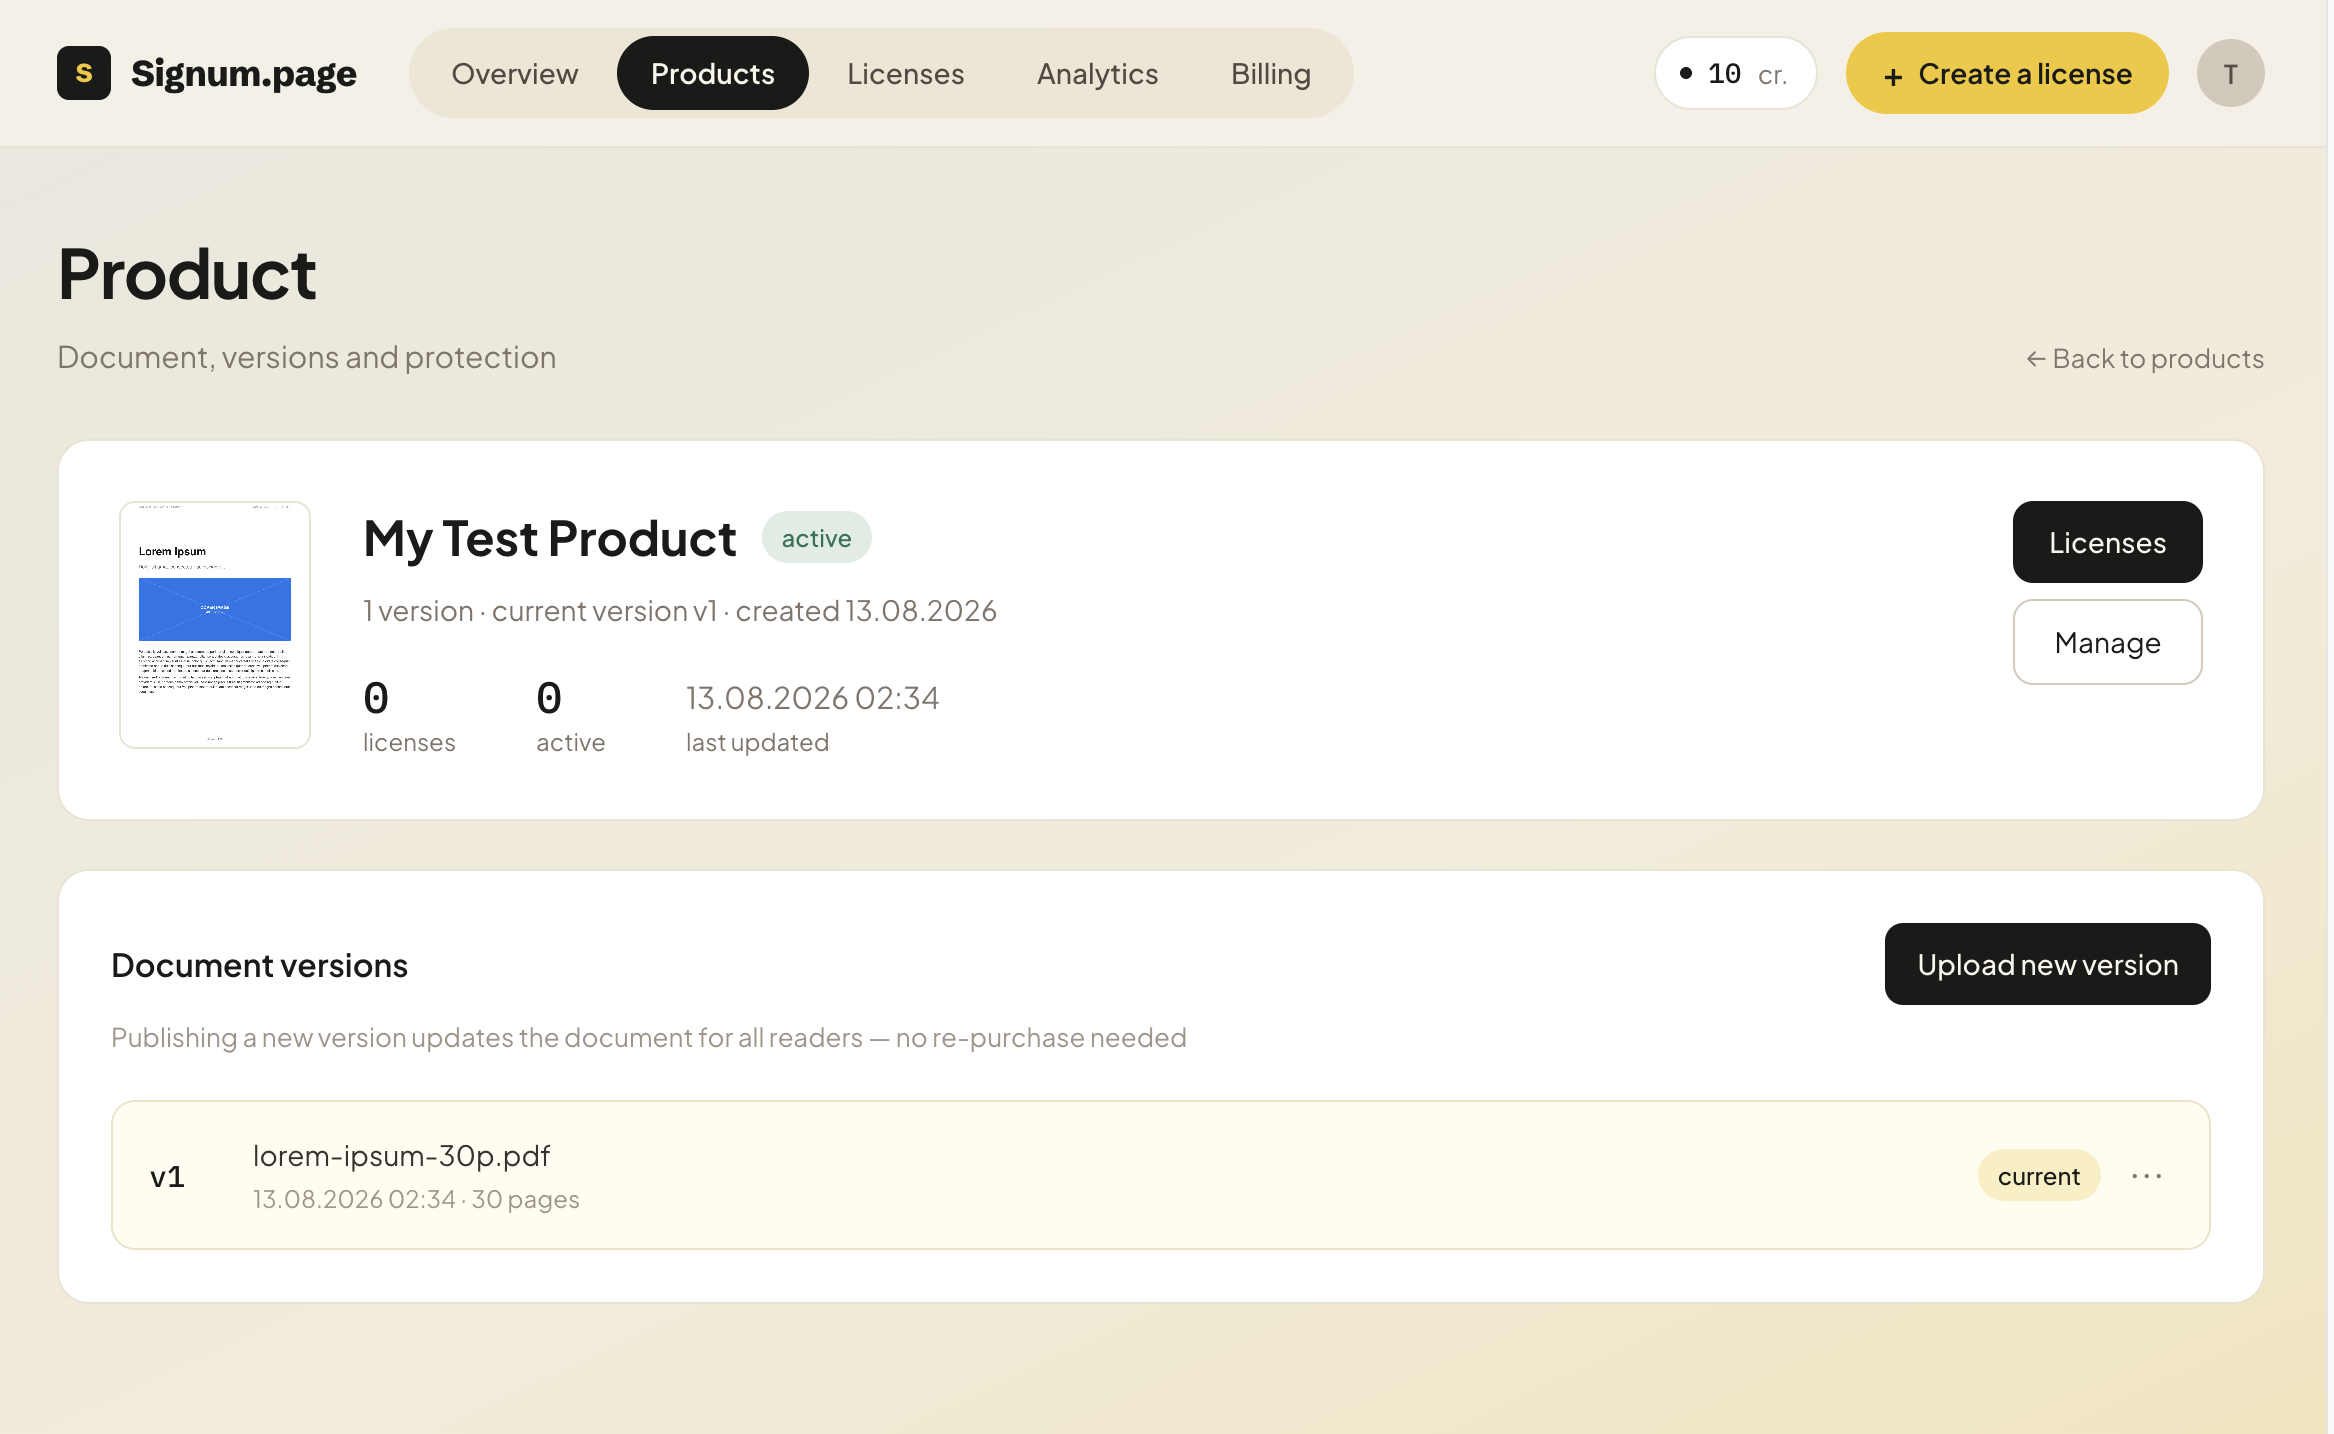
If processing ends with an “error” status, the problem is usually with the file itself: a corrupted PDF, password protection, or non-standard fonts. Upload the file again; if the error persists, contact support.
Step 3. Check how the document will look to the buyer
Open Management → Edit and scroll down to the “Document display” section. This is where you configure everything that affects the buyer’s reading experience:
- Repeat frequency and opacity of the watermark — how densely and visibly the buyer’s email is placed diagonally across the page. The more noticeable it is, the more it interferes with reading: start with “Normal”.
- Signature position — where the “Personal copy” line is displayed.
- Device limit and license duration — in the “License settings” section above.
Server-side rendering and blurring when the browser window loses focus are always enabled and cannot be disabled.
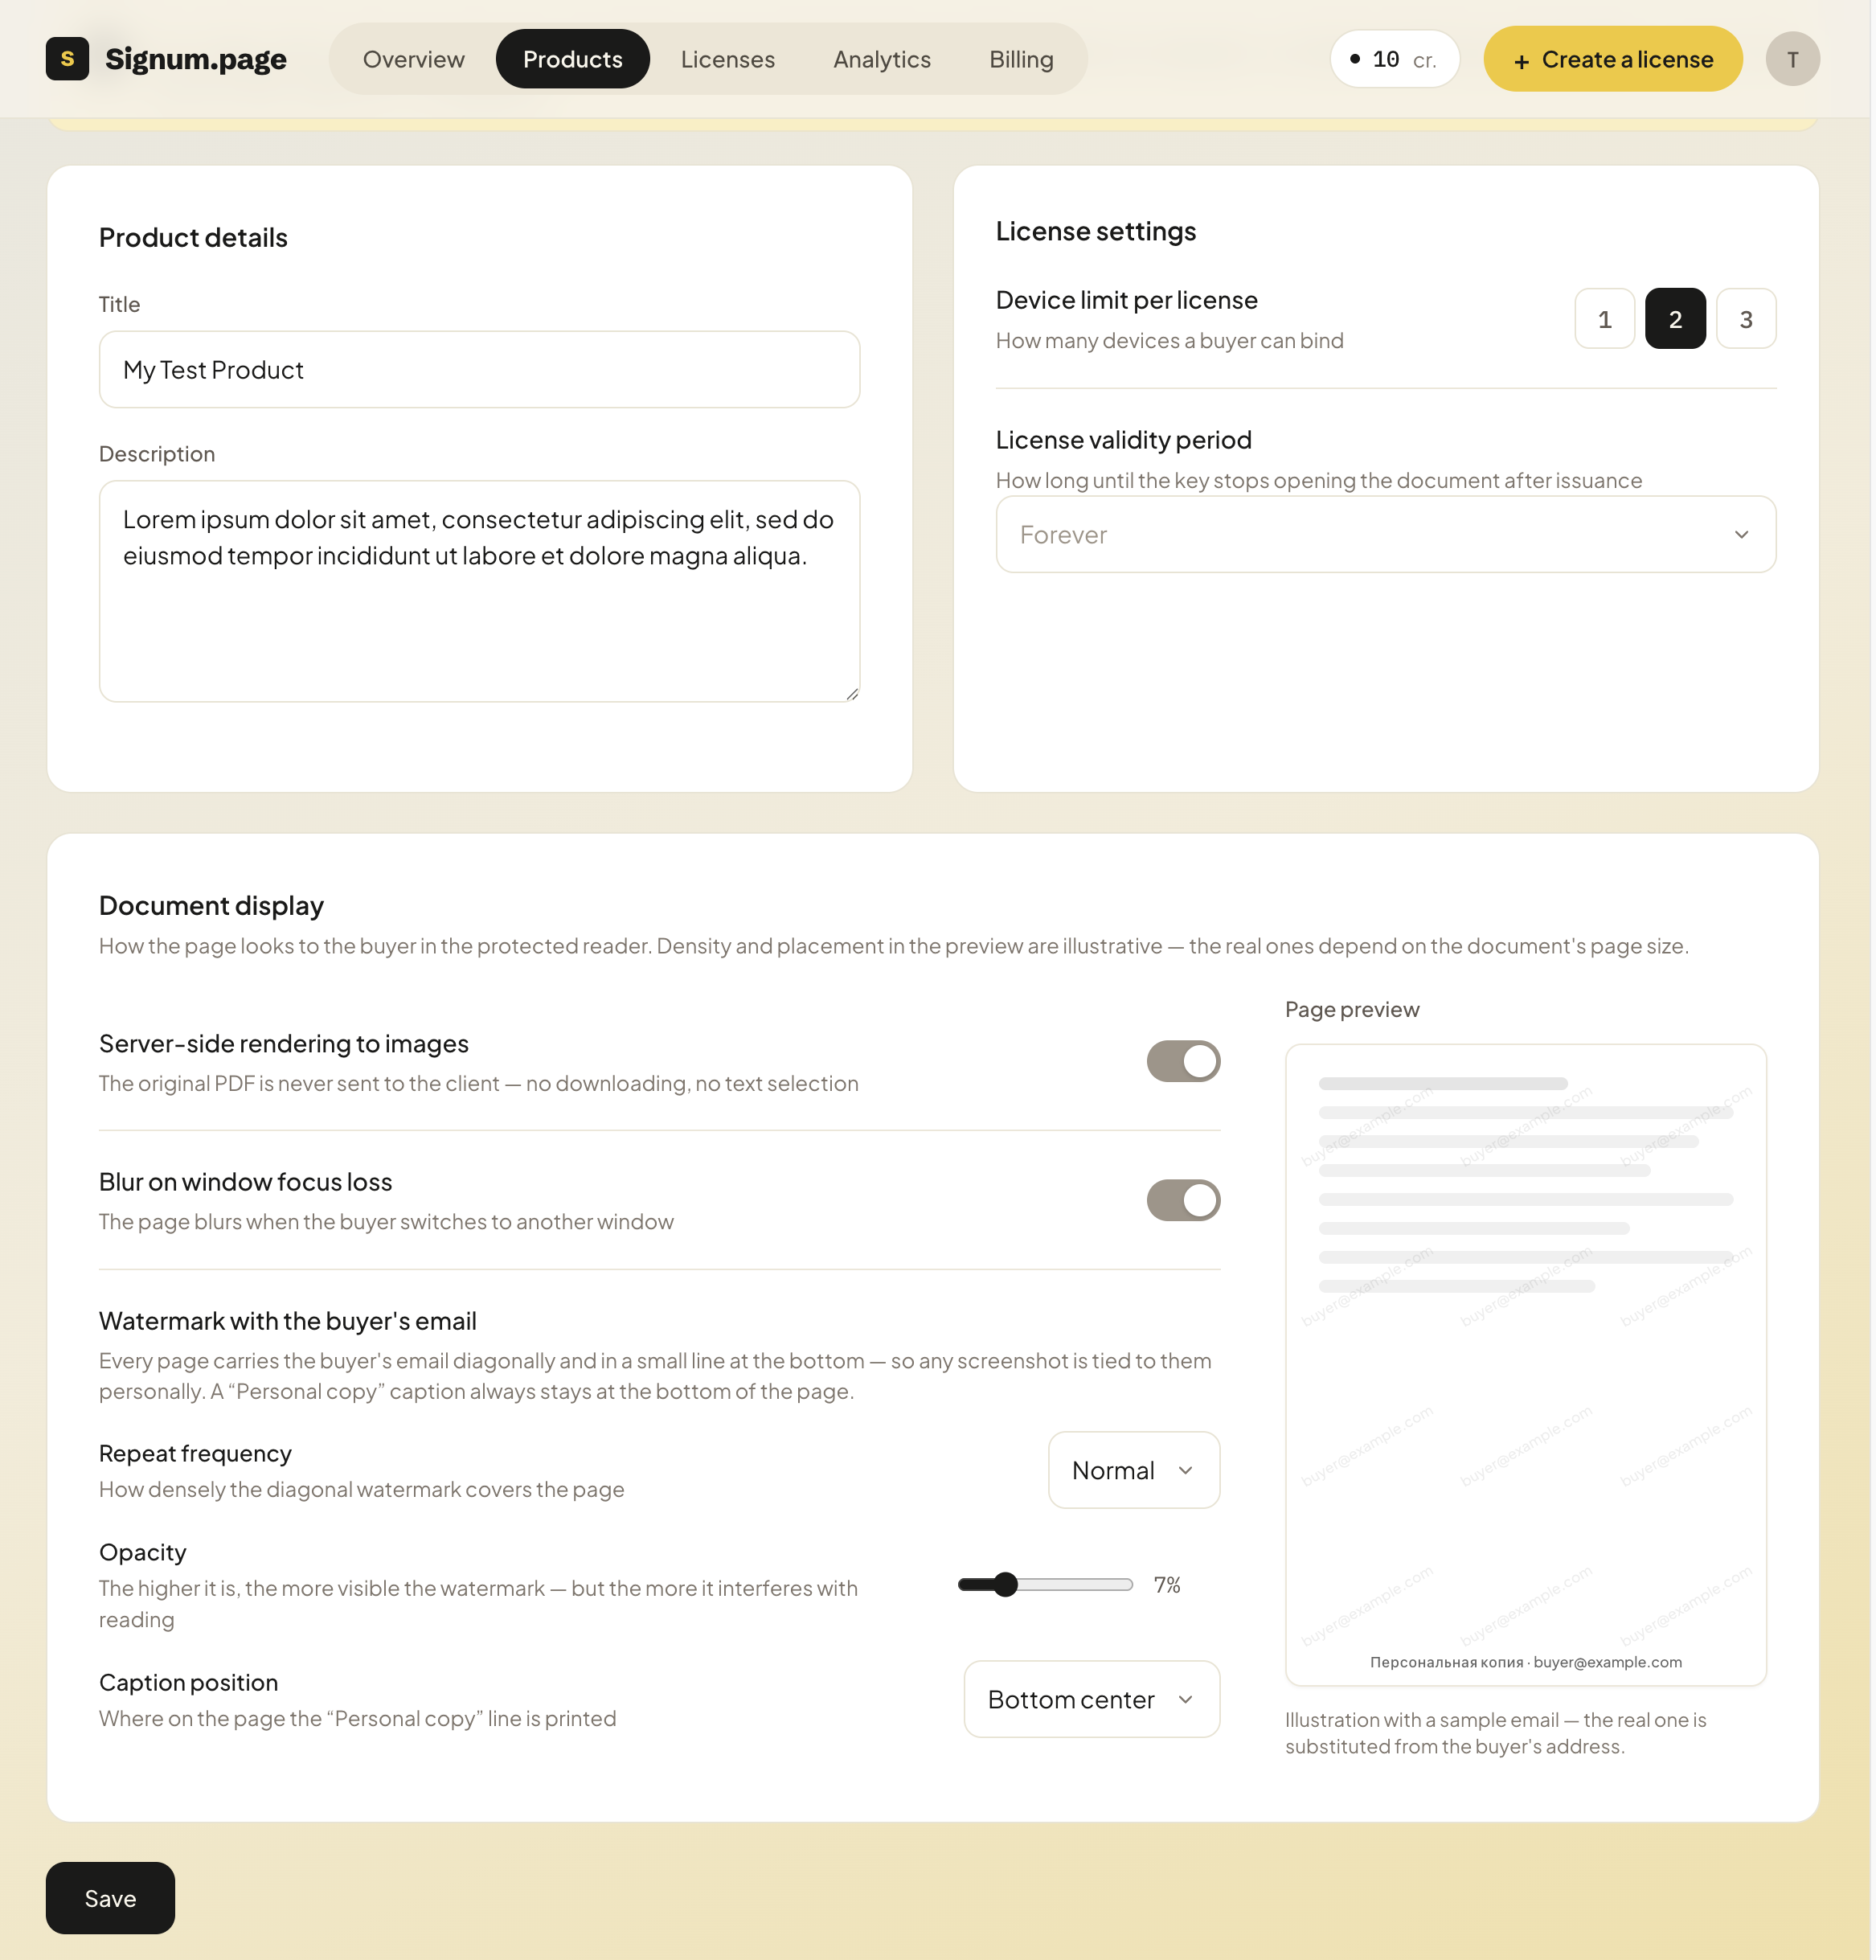
The preview on the right shows the result immediately. The watermark density and positioning there are approximate — on an actual page, they depend on its size.
Step 4. Create a license
Click “Create license” — the button is available from any section of the dashboard (in the top-right menu). Select a product and enter the buyer’s email address.
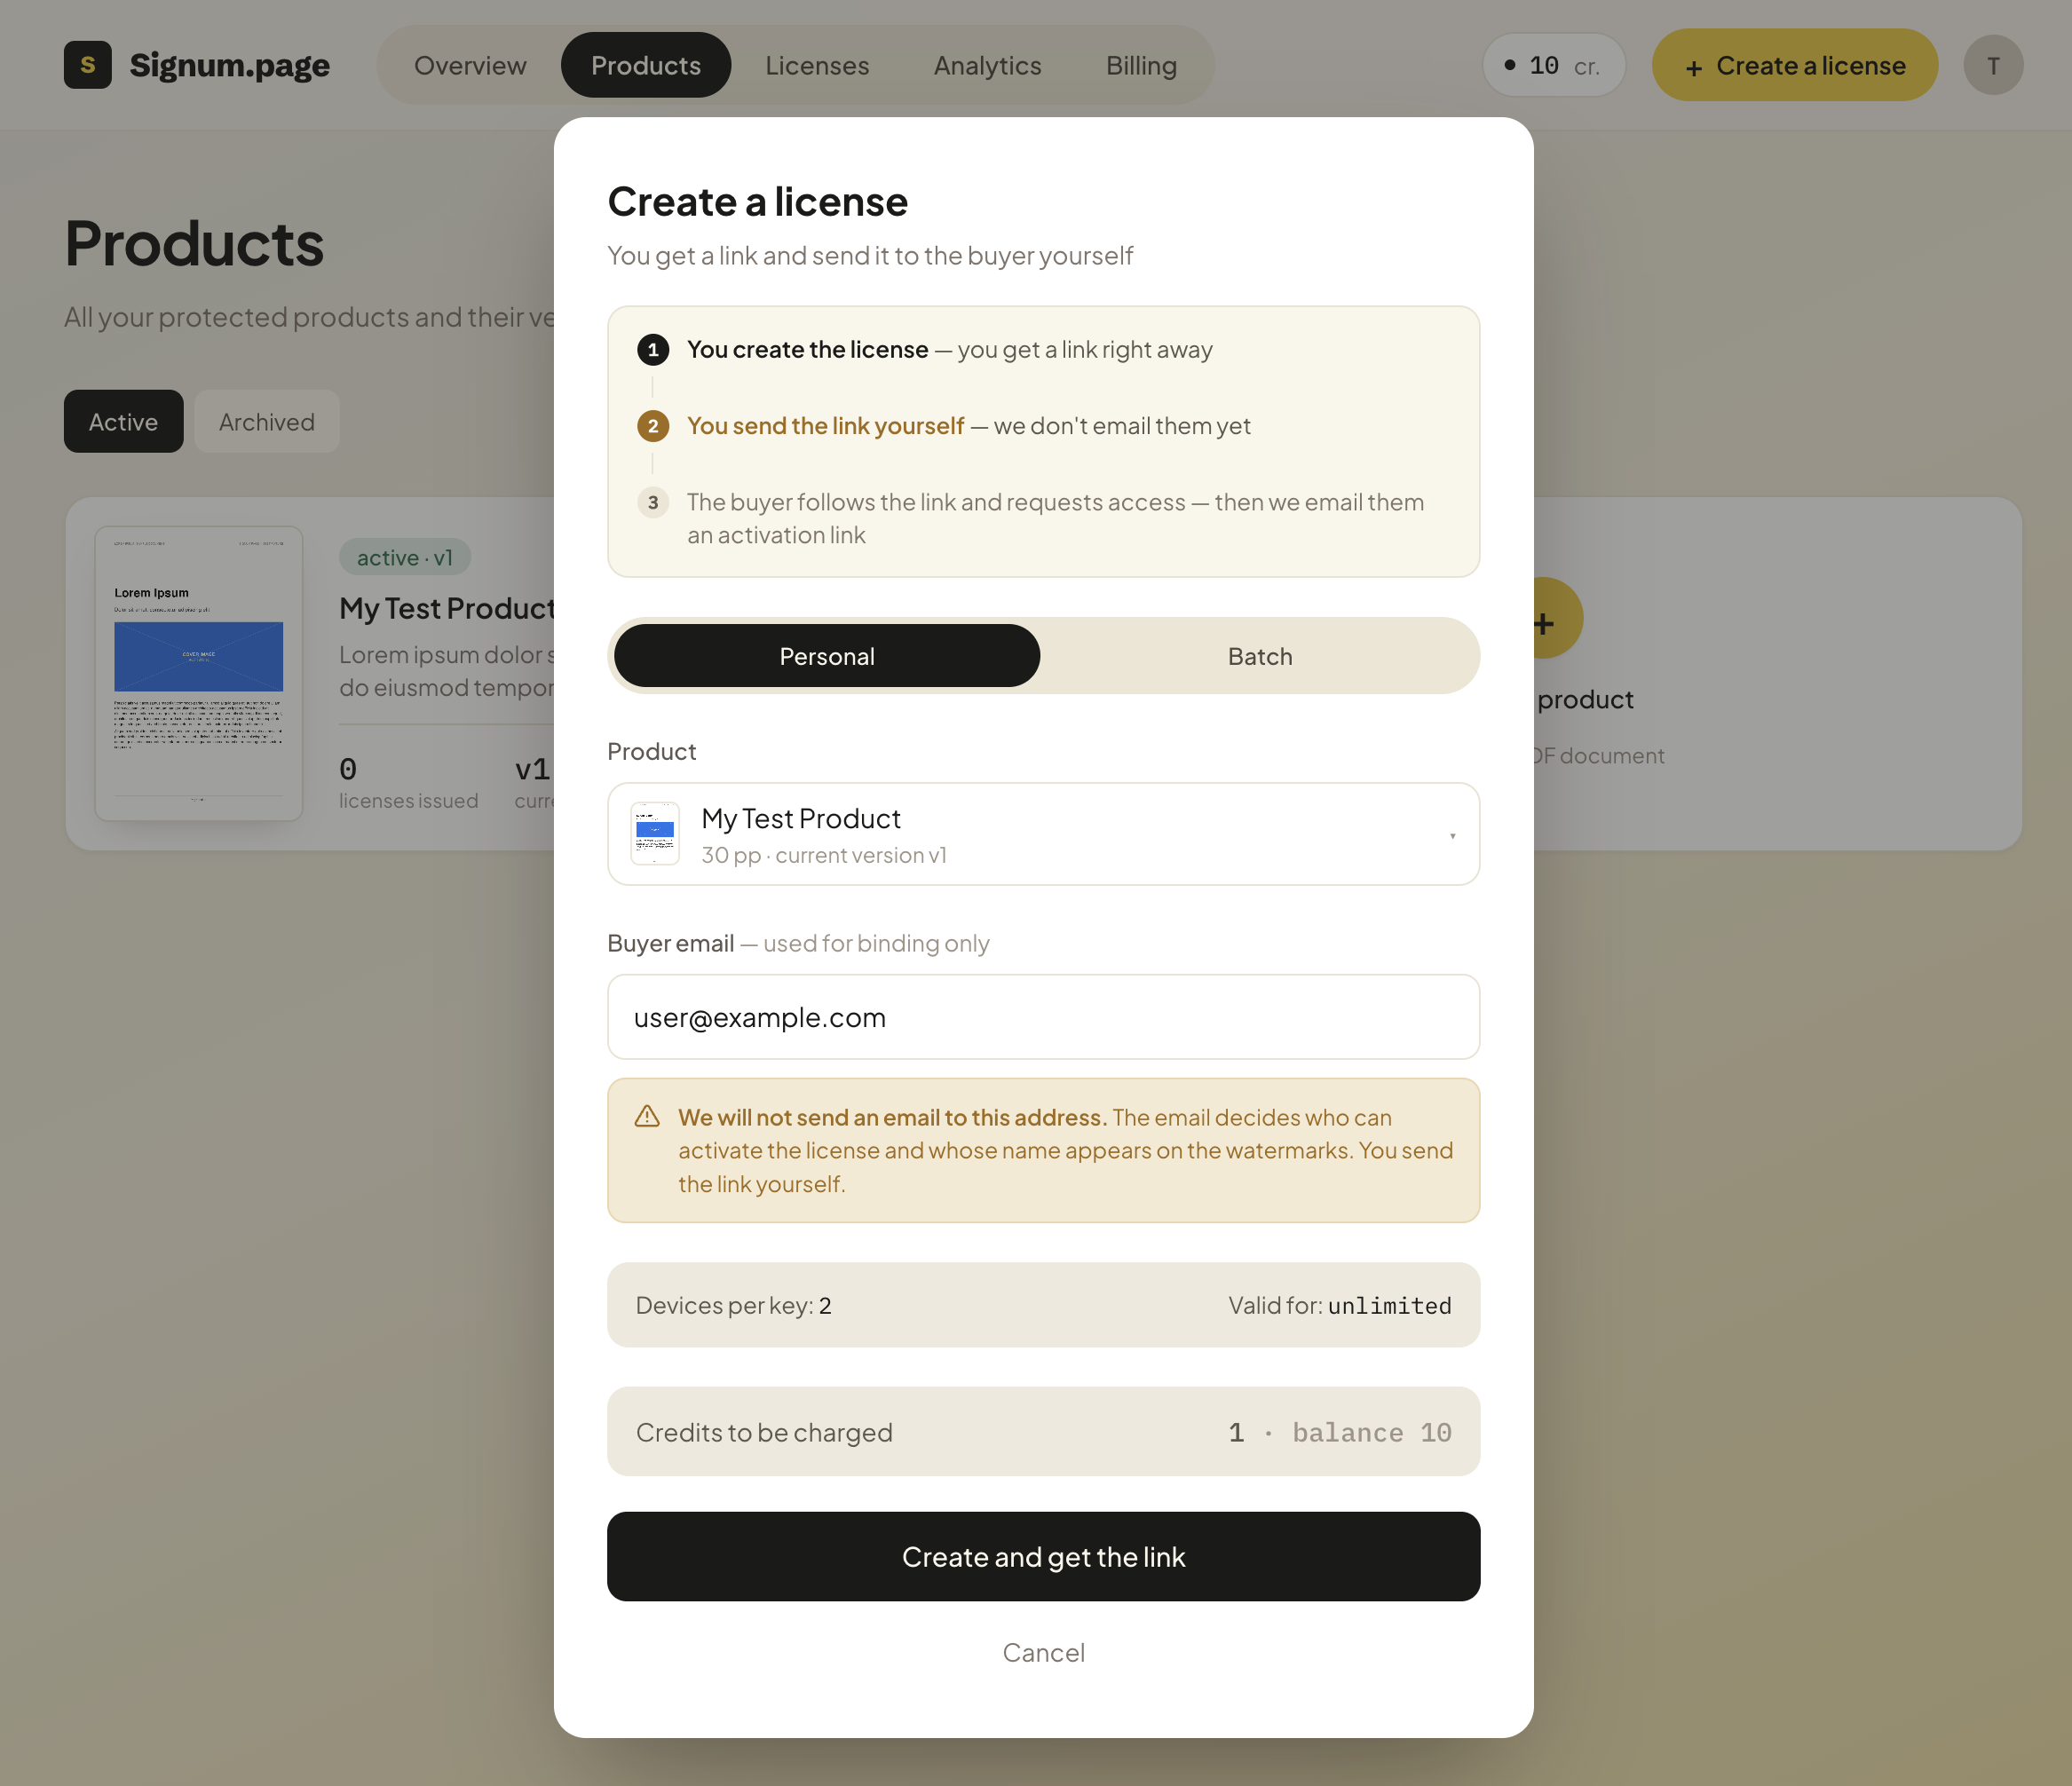
There is one important thing to understand here that will save you a lot of confusion later. The email address in this field is not a delivery address. We don’t send anything to it at this stage. It determines two things: who will be able to activate the access and whose email address will appear on the watermarks. If you enter the wrong address, you can still correct it before activation, but not afterwards: you’ll have to revoke the key and issue a new one.
At the bottom of the window, you can see how many credits will be used and how many will remain. Click “Create and get link”.
If you have several readers at once, switch to the “Bulk” tab and paste the list of email addresses, one per line. You’ll get the same number of links in one batch.
Step 5. Send the link to the reader
This is the final step and the only one that’s easy to miss. You send the link to the reader yourself — via messenger, email, or whatever works for you. Until they open the link, they don’t have access.
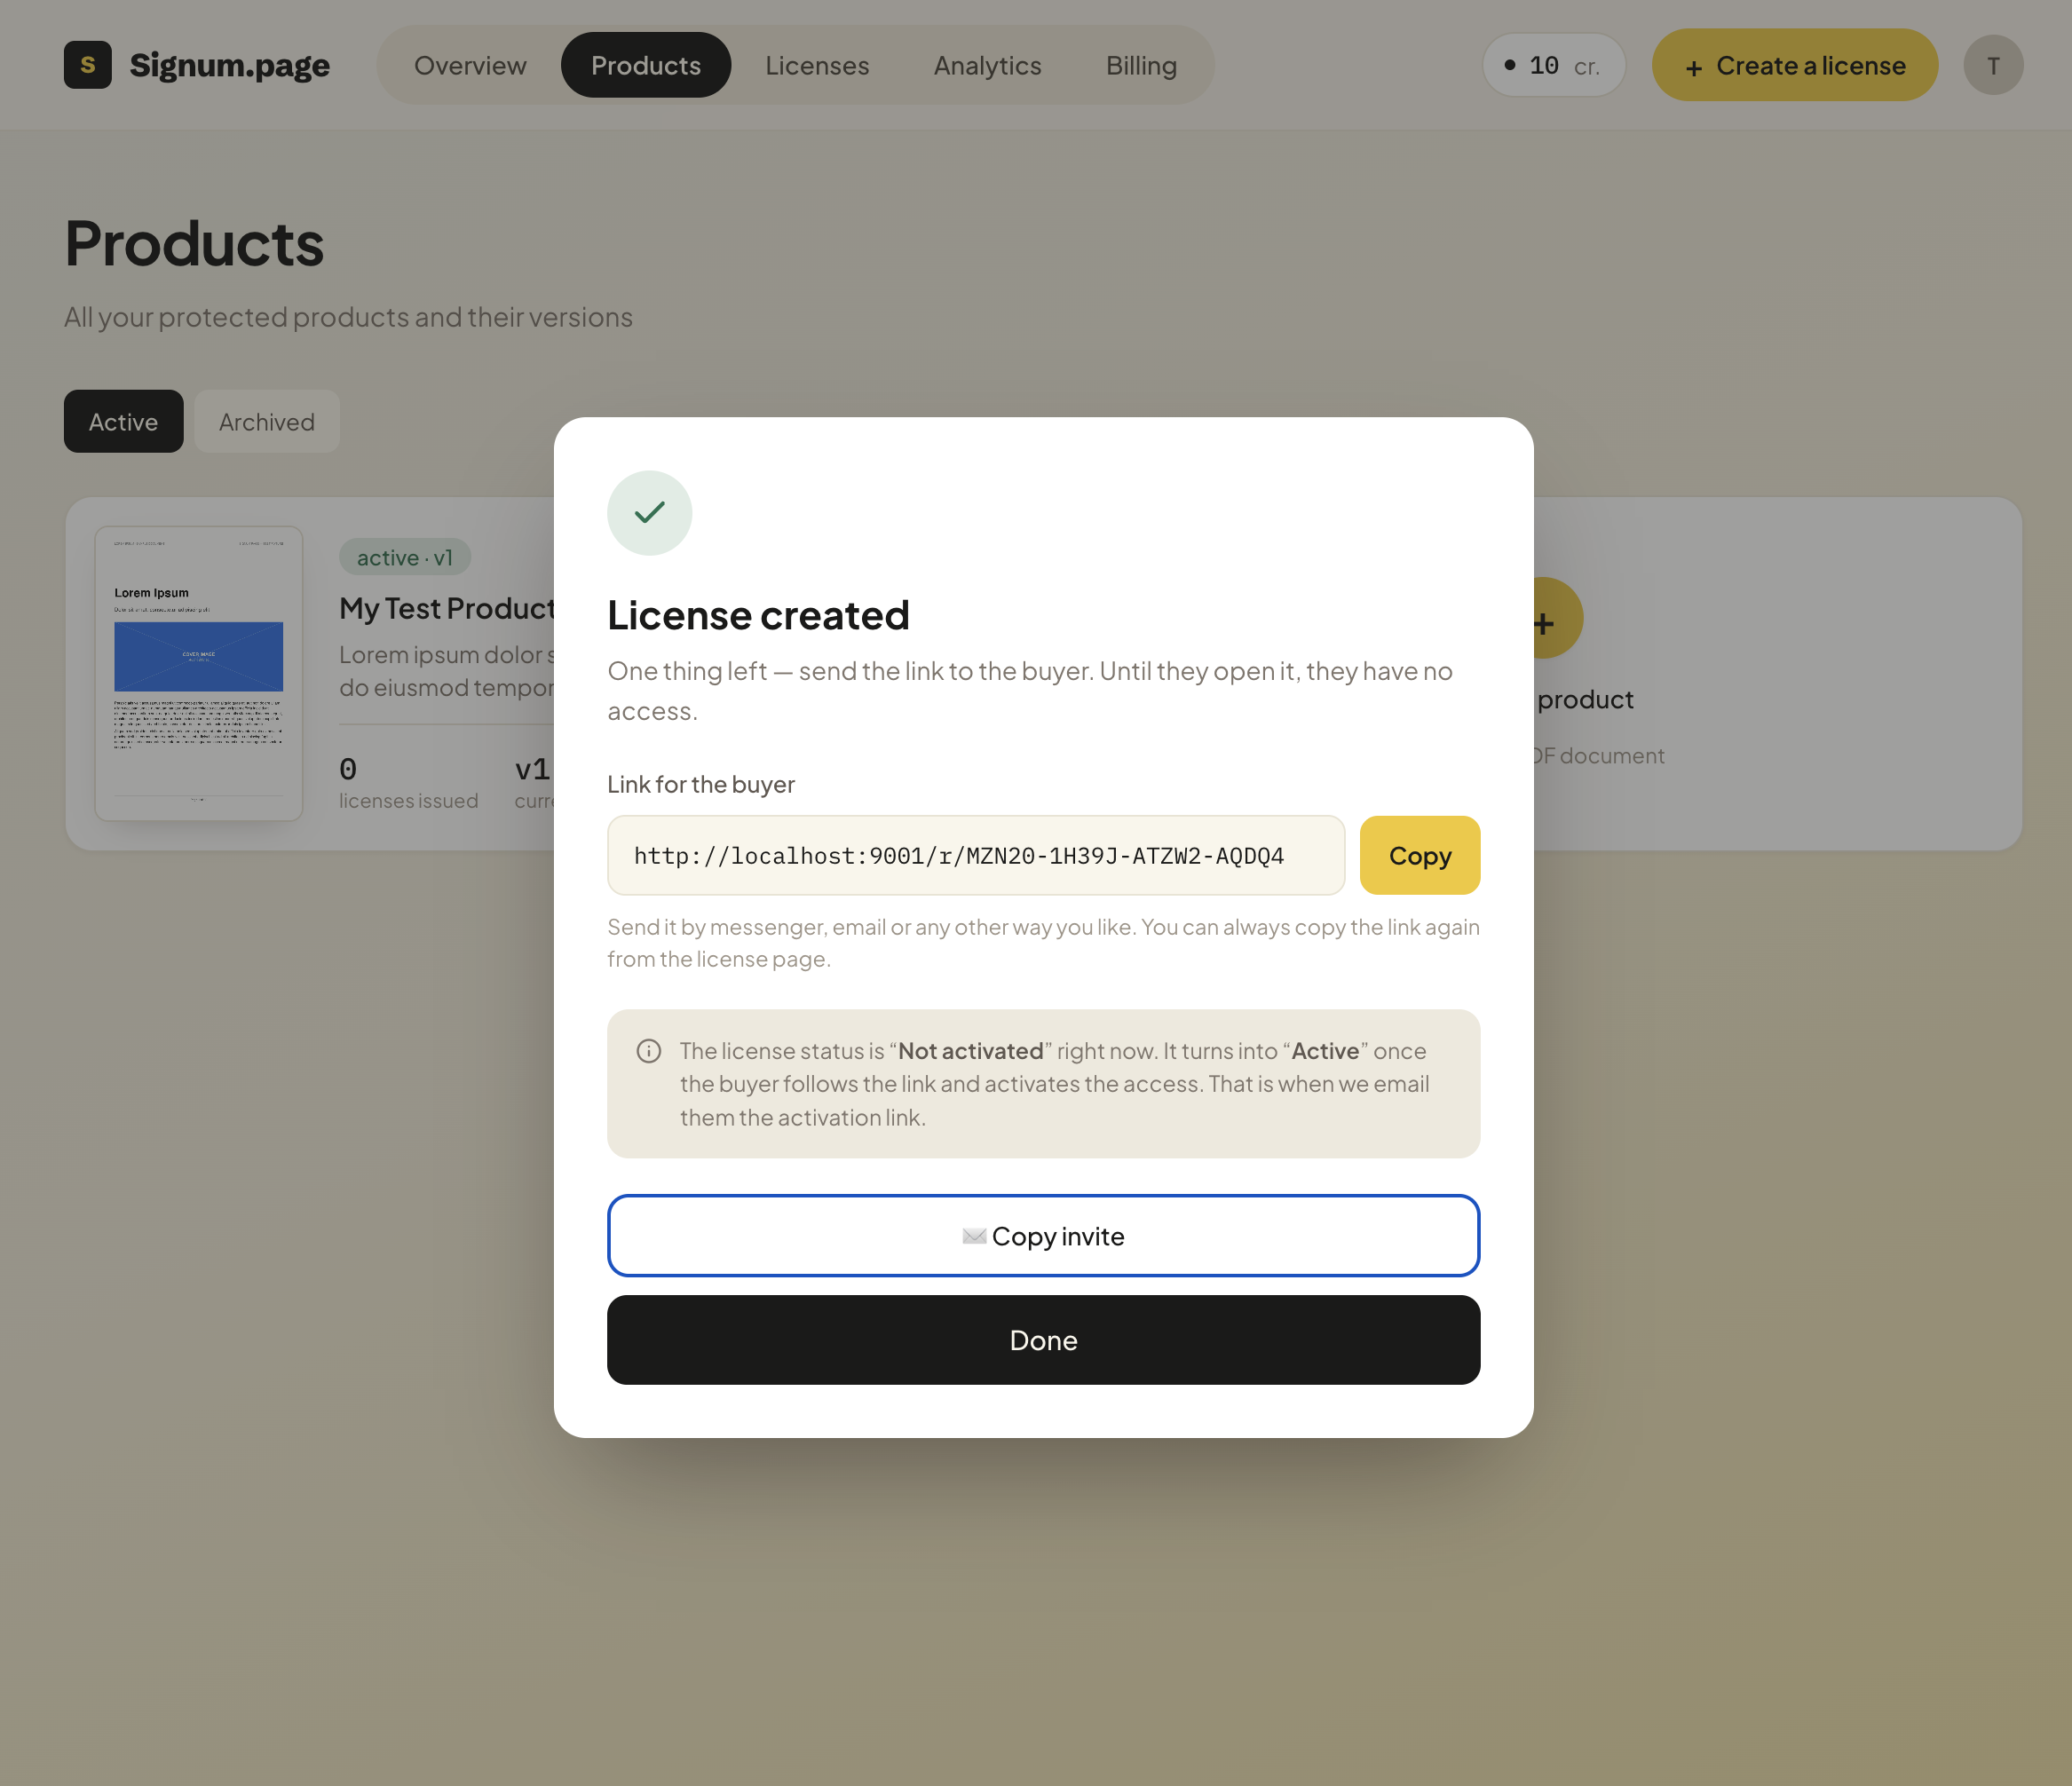
The “Copy” button copies the link itself, while “Copy invitation” copies a ready-to-send message together with the link. You can always copy the link again from the license page, so closing the window is not a problem.
Here’s what happens next: the reader follows your link and requests access — and at that moment, we send them an activation email. They confirm their email, their first device is linked, and the license status in your list changes from “issued” to “activated”.
What’s next
- Found a typo in the document? Upload a new version and make it current — it will become available to everyone who has already purchased it, without requiring another sale.
- Issued a license by mistake? Revoke it from the license page. The credit will be returned to your balance if the key has not been activated yet.